


Sewing on plastic canvas is really easy and fun to do. It's perfect for beginners who want to make something that looks awesome and more advanced stitchers who want to make a 3D project without the stress and complications of fabric. Sewing plastic canvas projects and Netflix binges go like cheese and biscuits, it keeps your hands busy and it's less calories than a bag of Minstrels. Heck, you're actually burning calories sewing!
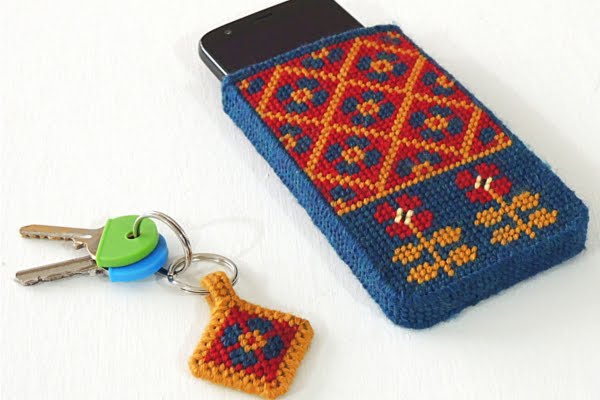
For the best results follow the order of stitches above, this will ensure the back of your sewing looks as neat as the front which is a must for projects where the inside is on show such as on our DIY: Fair Isle Plastic Canvas Phone Pouch Tutorial.
You can start sewing from the left or the right so I've added diagrams for both above. Whether you're a lefty or a righty, give each way a go and see which is most comfortable for you.
I like to stitch from the bottom up (is this a lefty thing?) but you can work it from the top down if that's what comes more naturally to you. The main thing is to enjoy it and have fun sewing so whatever works best for you is the way to go!
To begin, simply bring the needle up at 1 and hold the end of the yarn to the back of the canvas leaving about an inch of the yarn at the back.
Pass the needle down at 2 and up at 3, taking care to encase the end of the yarn in the stitch.
Bring your needle up at 4 and down at 5 and so on, covering the end of the yarn in stitches as you go. This will secure the yarn and stop it coming undone.
Once the end is covered carry on sewing as per the diagram until you've covered the whole area or reached the end of the yarn.
To secure the end simply thread your needle underneath the stitches on the back of the canvas in a couple of different directions before trimming close to the stitches.